XTIDE is a BIOS extension that helps to detect hard drives and probably a lot of other devices like Compact Flash and SD-cards. After I restored a 386 board at the end of 2024, I once more was confronted with a limitation of those old systems: HDD capacity.
Many 386 and even 486 systems are limited to hard drives no larger than 500MBs. That is plenty of space for such old systems since compatible software is also frugal when it comes to space requirements. With modern storage media in the Terabytes of available space, acquiring a drive below the 500MB threshold will quickly become a challenge. This capacity limitation originates from the system BIOS which most likely is restricted in the number of cylinders it can manage. In the screenshot below, taken from EZ-Drive that analyzed a 6.4GB Fujitsu drive, we can see that the system BIOS reports 1,025 cylinders only – a far cry from the 13,410 cylinders the drive actually has.
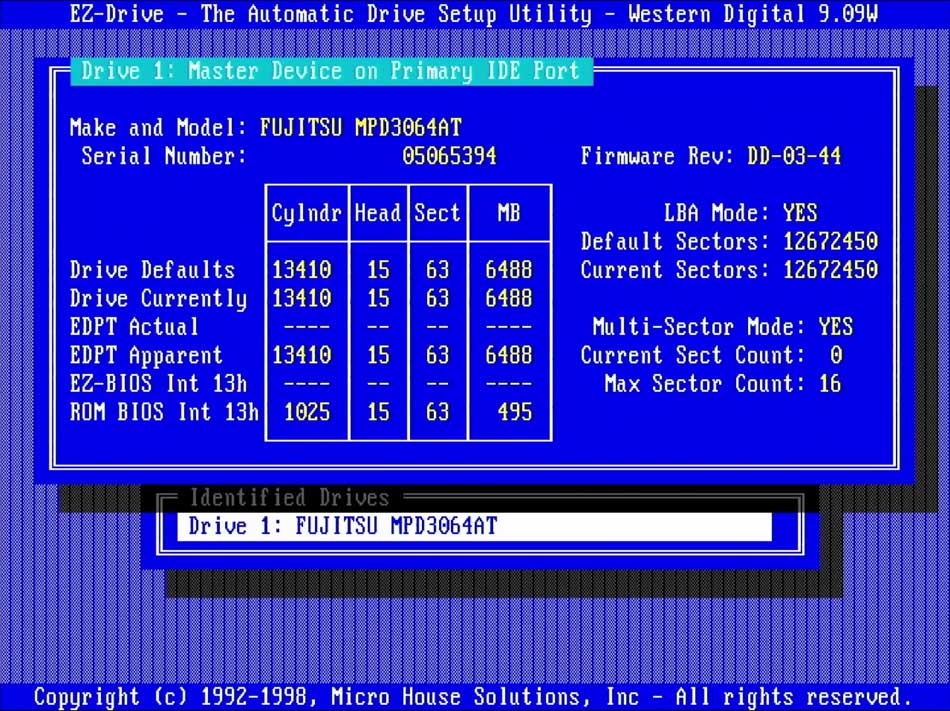
A workaround would be to install EZ-BIOS – the software that is copied to the hard drive by EZ-Drive. It acts as an overlay and overwrites the system BIOS values. This way, you can still access larger drives on older systems, like my 386SXL. Unfortunately, if you need to boot from a floppy disk, you are out of luck! Since EZ-BIOS is located on the hard drive, it will not be loaded when you boot from the floppy drive. As a consequence, you will also not be able to access your larger hard drive. There is an option built-in that should allow you to boot from drive A after EZ-BIOS initialized, but that somehow never worked for me – on several systems.
Luckily, there is an alternative. I would say, it is the perfect alternative: XTIDE Universal BIOS. This BIOS extension provides a super power to your system BIOS: It will be able to manage and configure larger drives. Unfortunately, it is not as simple as just installing a software. You will need some sort of an ISA card with an EPROM socket, a programmer to burn XTIDE to a 16KB EPROM, and – as always – you need some patience.
For my experiments with XTIDE, I used an ISA network card. Those cards are great because they usually have an empty socket that accepts an EPROM chip like the ST M27128A I am using.
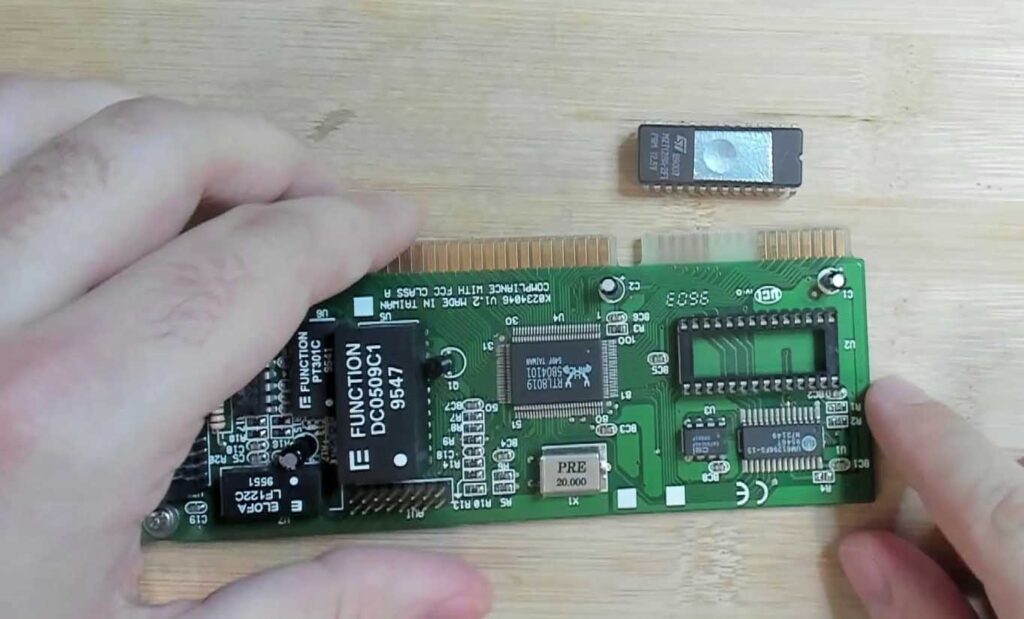
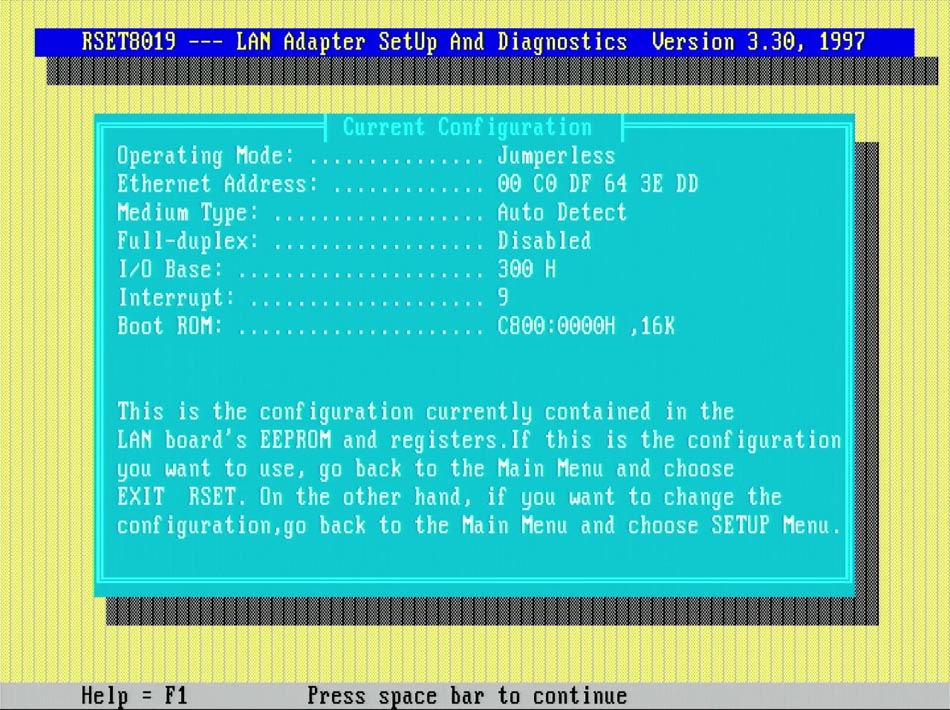
We also need to distinguish between jumperless and jumper mode ISA network cards. The card in the above image is jumperless. It is mandatory to configure some values on those cards to be able to use XTIDE. For instance, we may need to configure the IRQ, the I/O base address as well as the ROM memory location. On jumperless cards, this is usually done using software. In my case, Realtek still has the required software listed on their website. Go to the “DOS” section and download “Setup program and basic diagnostic”. This tool allows you to configure everything that is required to run XTIDE on your retro system.
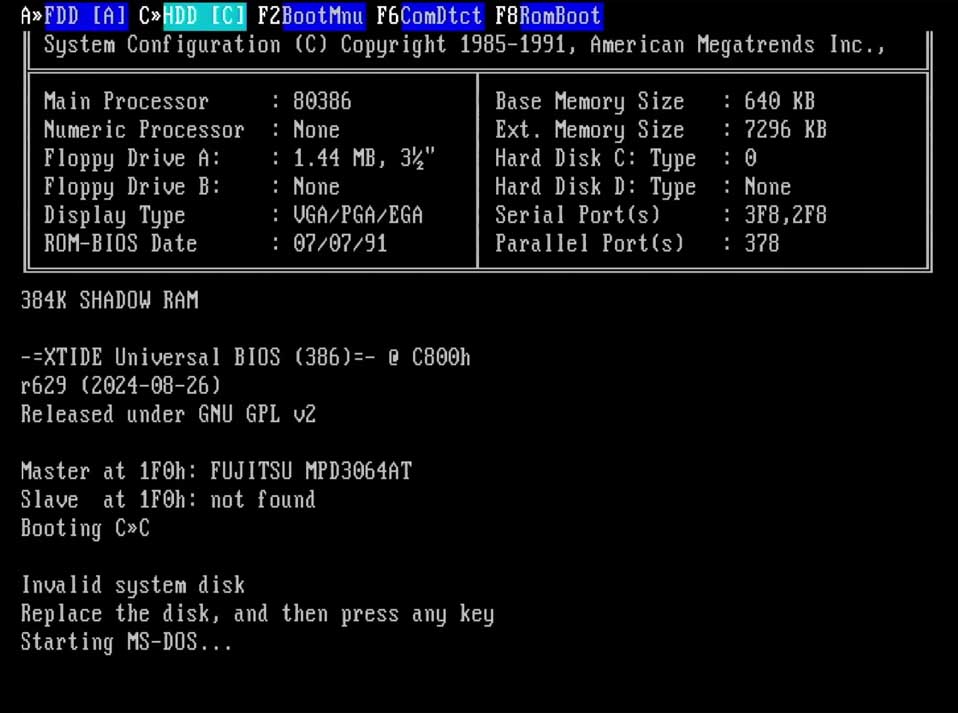
With everything configured correctly, you should be able to see XTIDE appear on your screen – and your system should now be able to talk to larger hard drives too! Below, you can see XTIDE detecting the Fujitsu 6.4GB hard drive.
That’s great, but how do we get XTIDE? Well, I made two videos about XTIDE.
In the first video, I try XTIDE the first time. You will see me make mistakes, but eventually, I figure out how it is done!
In a nutshell: DO NOT just download the binary files from the XTIDE project website and burn it to your EPROM. Make sure you configure the BIOS file as shown in the video above. However, there is a catch – at least at the time when I am writing this post. My physical hard drive, the Fujitsu 6.4GB, powers down right after XTIDE BIOS initializes. Apparently, this issue stems from a module that is included in the BIOS file: the Power Management Module.
In order to fix the issue of the drive that powers down, I had to rebuild the XTIDE BIOS and exclude the offending module. The process may seem difficult, but with a bit of help, anyone can build their own XTIDE BIOS binary files. You can follow the video below – which also points out a very tiny issue in the code that prevents the XTIDE custom BIOS from building. All those details are in the second video linked below.
Now, of course, I will provide the files from the video. However, you need to be aware what files you download! Both BIOS files I provide here are for 386 systems or newer and do NOT include the ‘Power Management’ module.
If you just want to try the configured (only ONE IDE controller) BIOS, then you can download the file right after this paragraph and burn it to one of your EPROM chips.
If, on the other hand, you want to start over with an unconfigured XTIDE BIOS that does NOT have the ‘Power Management’ module, then you can download the files below. Please make sure to configure the XTIDE BIOS before you burn it to your EPROM chip.
I hope that helps – and let me know if you need help by commenting below any of the videos I posted above. This is usually a good way to get in touch with me. Or, you can go ahead and contact me via email.
Here is an update on how to use XTIDE from a floppy disk!
Below are the floppy image files as well as the tool to write them to your floppy disks.
