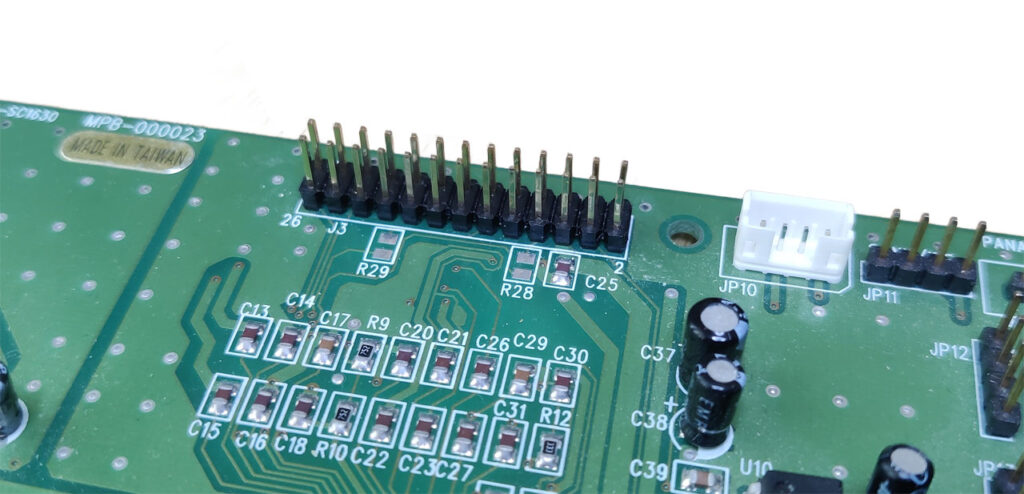
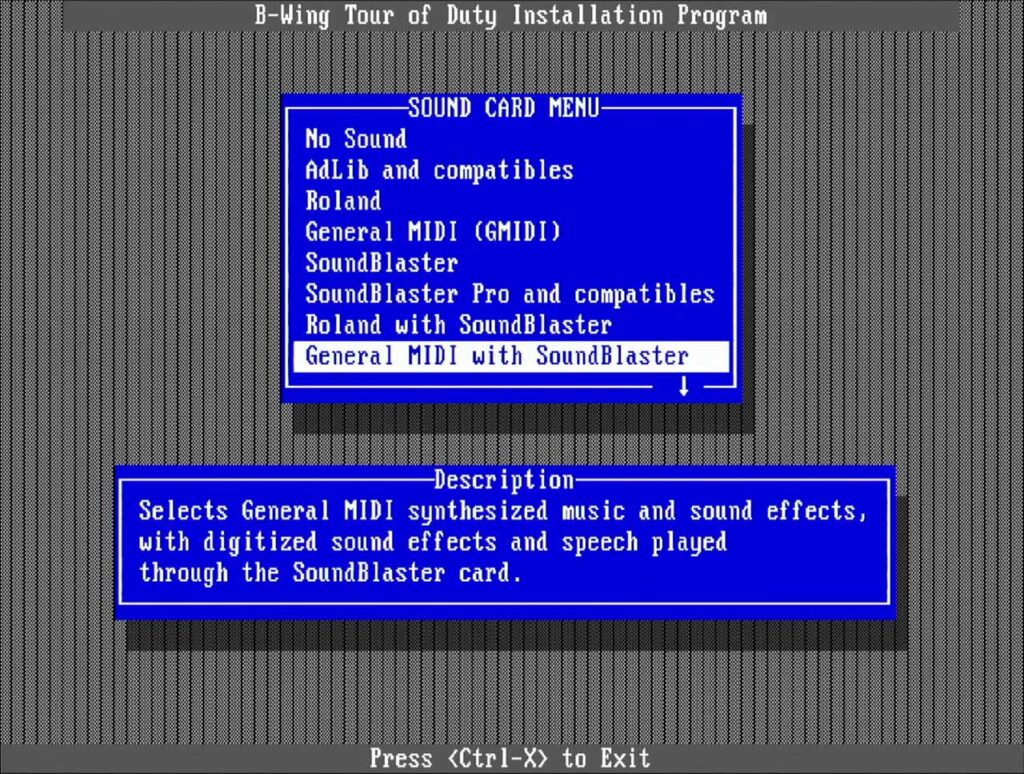
If you’re anything like me, you probably didn’t think much about the Wave Table header on those old-school sound cards. But I always wondered about that “General MIDI” option in games. Every time I picked it, the MIDI music just wouldn’t play. It wasn’t until recently that I finally cracked the code on what General MIDI is and how to make it work. Spoiler alert: you need a Wave Table Daughter Board!
How it all started
I stumbled upon a project from Scrap Computing – actually, he released two videos about the WavetablePi! The first video is the introduction of the project, the other one is about improving the audio quality. I actually built one of those WavetablePi boards and it worked beautifully! But, there was one issue that I wanted to solve! The WavetablePi is a stacked solution – meaning, you place multiple PCBs on top of each other. That makes it impossible to use the ISA slot above.
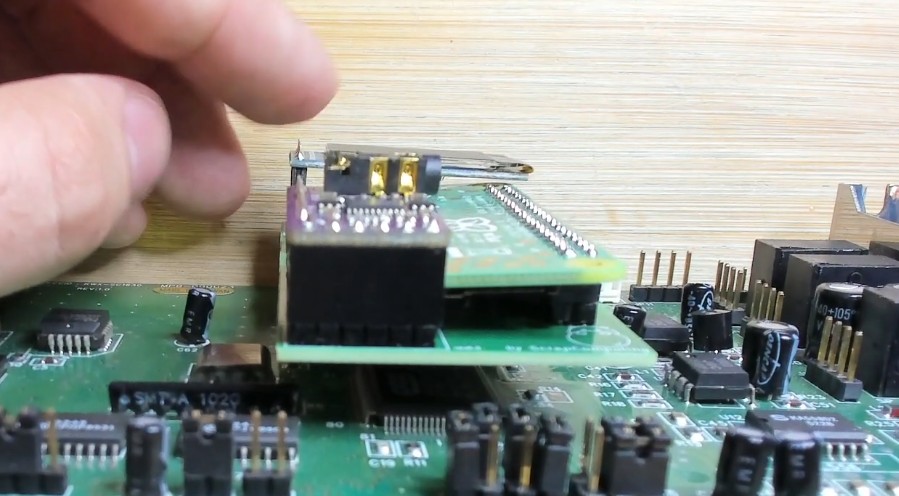
While the WavetablePi opened a new world for me, I wanted to improve on the design! The goal was to make a single-slot solution so you can use the adjacent ISA slot if you must. Also, no component should be placed on the bottom of the PCB to avoid any shorts caused by touching components. As a result, every component, including the pin headers, must be SMT. And finally, I wanted to add more features! You can use tactile push buttons to switch between Synthesizers (Sound Font, MT-32), loop through Sound Fonts or MT-32 ROMs, and adjust the volume. Finally, I added a connector for a break-out cable so you can attach a front panel if you want. There is also an option to use a rotary encoder control if you’d like.
Where are the MT-32 ROM files?
Unfortunately, due to copyright, I cannot include the ROMs of the MT-32 device. However, they can be found easily online.
Here are the file names I placed to get MT-32 old/new and CM-32 Synth:
- cm32l_pcm.rom
- cm32l_ctrl_1_02.rom
- mt32_pcm.rom
- mt32_ctrl_1_07.rom
- mt32_ctrl_2_07.rom
The mt32-pi Project
“A baremetal kernel that turns your Raspberry Pi 3 or later into a Roland MT-32 emulator and SoundFont synthesizer based on Circle, Munt, and FluidSynth.”
— Dale Whinham
For your WavetablePi to work (or as we progress further the MIDI FORGE Maestro), you need an operating system for the Raspberry Pi Zero 2W. Luckily, Dale Whinham shared his amazing mt32-pi project for anyone to use! Without the hard work that went into this project, neither the WavetablePi nor the MIDI FORGE Maestro would be possible!
Copy the mt32-pi project to a micro-SD card that is formatted in FAT32. If you use larger than 32GB micro-SD cards, you need to use a utilities like guiformat. You can find more information on Dale’s github post.
Other helpful links:
mt32-pi on github
Download latest mt32-pi release
Rotary Encoder details
SD card preparation
Thank you Dale!
The MIDI FORGE Maestro
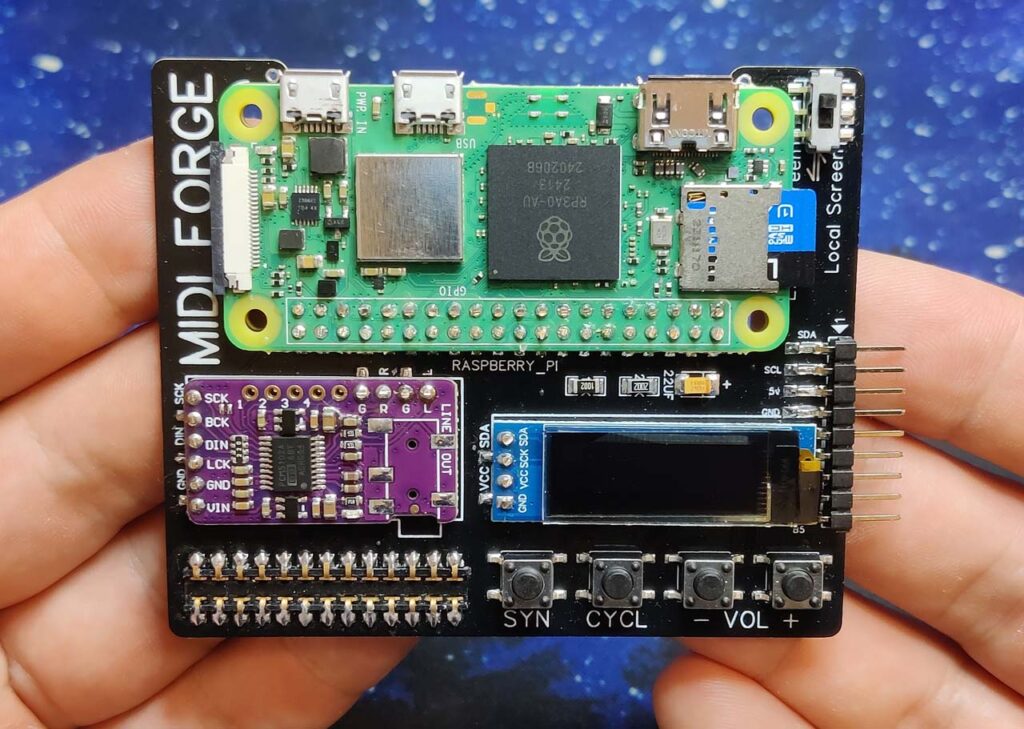
The MIDI FORGE Maestro is built around the mt32-pi project and supports most of the features the project has to offer. You have an onboard screen, four push-buttons, and a break-out connector to connect an external screen, buttons, or a rotary encoder. You can also watch my video on all those features and how to configure the mt32-pi project here:
The good news is that you can built the MIDI FORGE Maestro by yourself! All you need are the components (which I will list a bit further down this post) and the PCBs. The PCBs are available on PCBWay’s shared project space. If you need to make an account over at PCBWay, you can use my referral link to do so (you will get 5 USD off your first order as a new customer).
Let’s get to the Chase
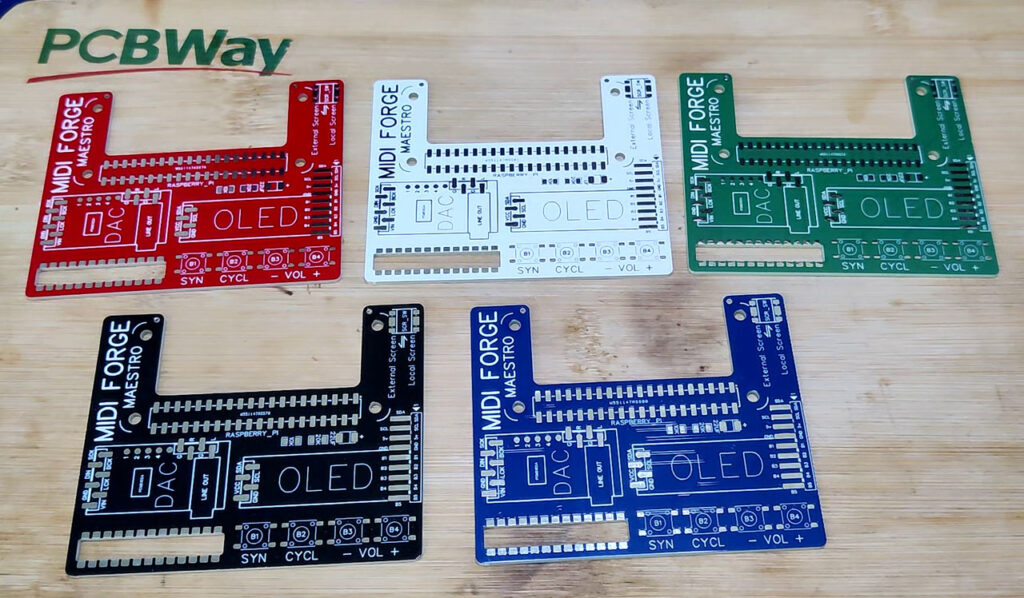
First, you need to order your PCBs – PCBWay allows you to pick from several colors. There are also premium colors available, but I wouldn’t consider those since the PCB is mostly covered by other PCBs.
I highly recommend buying the small 0.91″ OLED display from PCBWay too since they do not solder the pins to the PCB! Below is a list of other components you need to get:
| Component | Units | Links | Details |
|---|---|---|---|
| OLED Display | 1 | PCBWay | PCBWay doesn’t solder the pins to PCB. Order it together with the PCBs. |
| Digital to Analog Converter (DAC) | 1 | AliExpress | Make sure the DAC has the resistors on the back. |
| Raspberry Pi Zero 2W | 1 | AliExpress Amazon US Amazon DE | Make sure it doesn’t have the 2×20 pin header soldered. |
| 2x13P 2.54mm Pitch Pin Header SMT | 1 | AliExpress | This is the connector that clips the board to the Sound Card. The female pin header has a pitch size of 2.54mm. |
| 2x20P 2.54mm Pitch male Pin Header SMT | 1 | AliExpress | This connector is for the Raspberry Pi. Excess pin length has to be cut with a wire cutter. It is a male pin header with 2.54mm pitch size. |
| 1x9P 2.54mm Right Angle Single Row male SMT | 1 | AliExpress | This connector is for the break-out cable in case you want to use a Front Panel. It is optional. If you don’t plan on using a Front panel, you can ignore it. Those pins headers come in larger size – you need to cut it to size. |
| 6x6x5 Push Button Switch SMT | 4 | AliExpress | The four buttons control: Synthesizer, Sound Font or ROM, Volume (up/down) |
| 1x4P 2.54MM Male SMT | 2 | AliExpress | SMT Pin headers for DAC and Screen. They usually come in larger sizes and need to be cut to size. |
| 1x6P 2.54MM Male SMT | 1 | AliExpress | Same as above – just 6 instead of 4 pins. Second row for the DAC |
| 2P2T 6Pin MSS22D18 Slide Switch 2mm SMT | 1 | AliExpress | 2P2T switch to toggle between local and external screen. You can skip this part if you want to use only the local or the external screen. You must create solder bridges on the pads if you do not use a switch. |
| 10K Resistor SMT 1206 | 1 | Mouser / DigiKey | SMD component. Size 1206 |
| 20K Resistor SMT 1206 | 1 | Mouser / DigiKey | SMD component. Size 1206 |
| 22uF Tantalum capacitor (Type B / CASE-B) If you cannot find the tantalum capacitor, you can use a 1206 ceramic cap. | 1 | Mouser / DigiKey | SMD component. Type B / CASE-B |
Luckily, I don’t have to explain how to assemble it because I already made a video about it:
If you have any other questions, shoot them my way and I will try to answer them!
Cheers,
Alex